HDRI Shooting Workflow
Table of Contents:
This is a quick description of how I shoot HDRI panoramas.
Shooting
I use a 9mm wide angle lens on a Micro Four Thirds camera. According to the panorama calculator here, this gives a shooting pattern of a total of 15 exposure stacks.
| Vertical angle | Amount of images |
|---|---|
| -60° | 4 |
| 0° | 7 |
| 60° | 4 |
I was buying a used panoramic head, that I mount onto my existing tripod. This is a pretty stable solution. However the patterns on the panoramic head only let me choose between 4, 6, 8 and 12 images evenly spaced on 360°. So I shoot one additional image on the middle round and take 8 instead of 7 images.
This panoramic head allows for turning the vertical arm 180°. This allows to easily shoot the nadir.
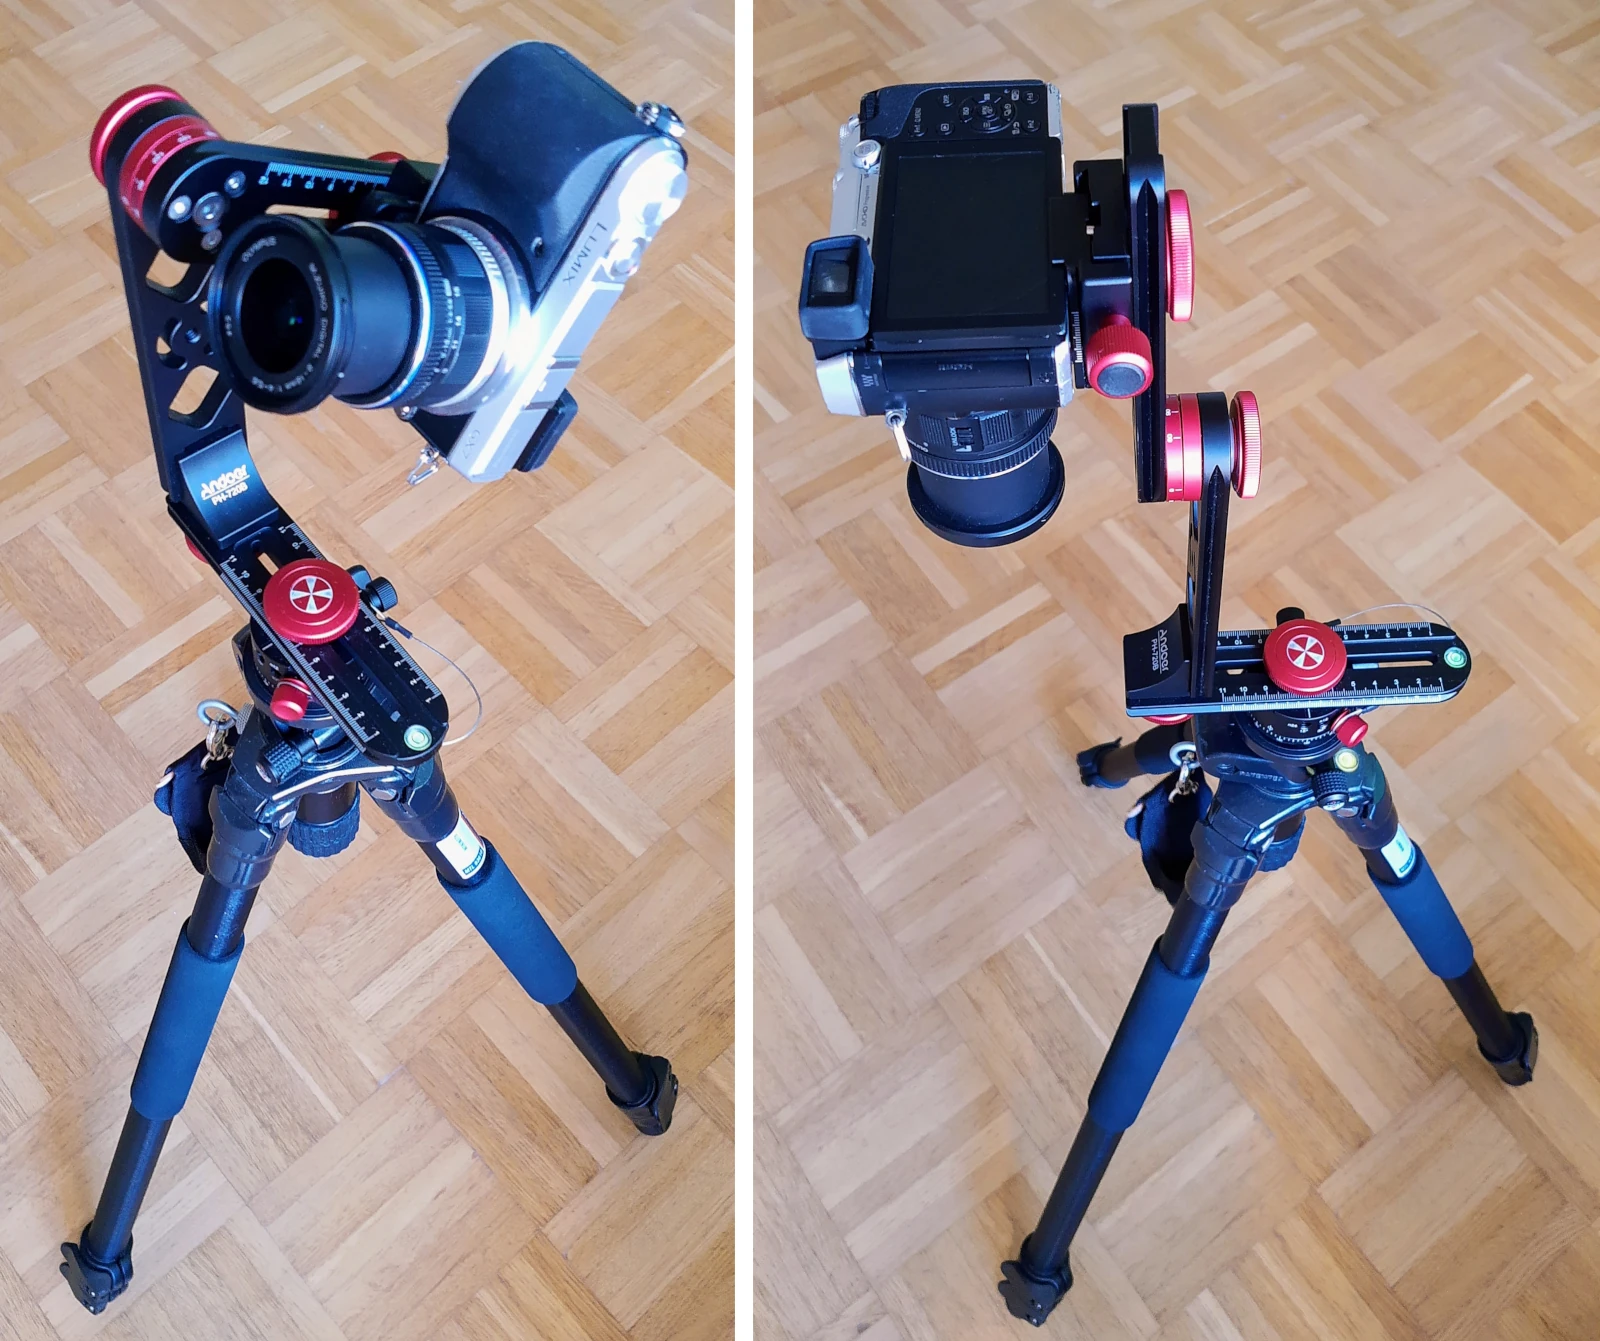
The first series is the sun shot with a neutral density filter on the lens. I use an ND-1000 filter, which allows to shoot the clear sun unclipped with the 1/8000s exposure time and an aperture of f22. This also ensures, that I align the panoramic head in such a way, that the sun is on angle 0 and that the sun is aligned with one of the 360° stacks I shoot. This will become handy when stitching the panorama.
Bracketing
My camera (Panasonic Lumix GX7) only allows for an auto-bracket series of 7 images with only 1 stop distance. This is not enough for a real HDRI. However it allows for WIFI remote control. Thus I’ve written a pretty minimalist Android app, that takes over the bracketing. This was heavily inspired from the research about reverse engineering the Panasonic protocol here and an implementation of a python module here.
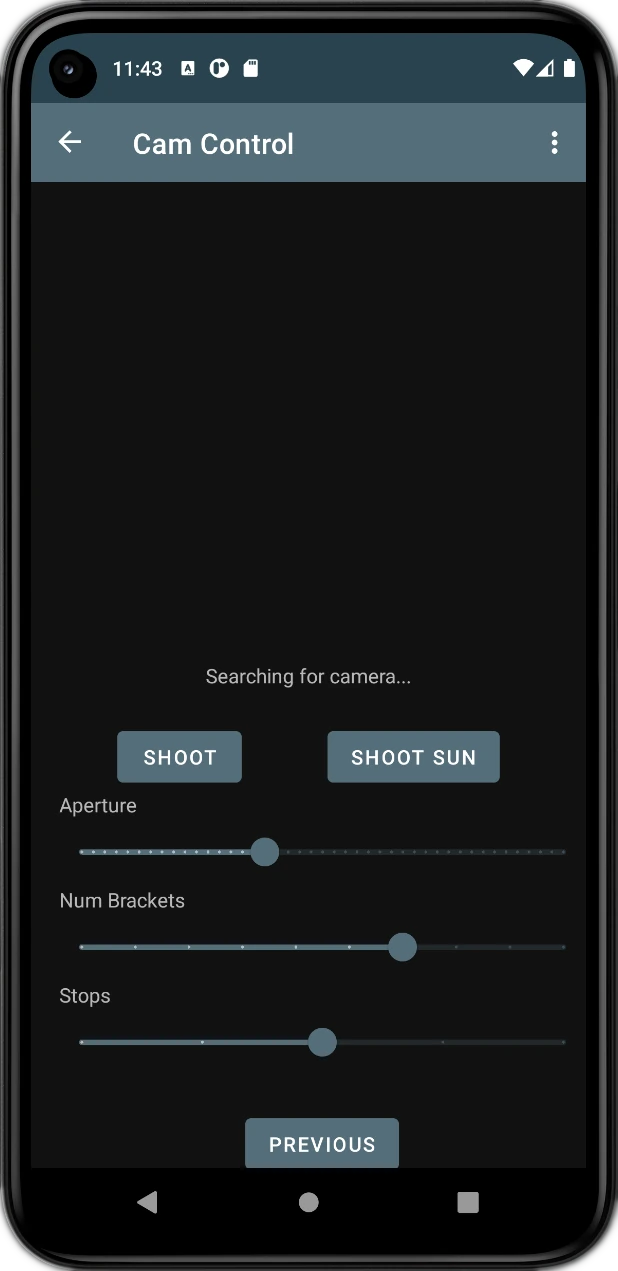
The app offers settings to adjust the number of shots and the stops they shall be apart. Additionally is allows to set up the aperture. That way I don’t have to tweak buttons on the camera when switching between shooting the sun with the ND filter and the rest of the panorama. It can happen very easily to forget about readjusting the f22 aperture and then shooting a panorama, that’s more blurry than it needs to be.
The app HDRBracket itself is available on GitLab.
Raw image processing
The processing of the raw images happens with RawTherapee. The HDR tools repository linked below offers 2 presets for indoor and outdoor processing. Both are based on the RawTherapee settings of Greg Zaal, he described on his blog.
Panorama creation
After having processed the raw images into tiff, the panorama setup begins. This is done through little python scripts, available together with the HDRBracket Android app on my HDRGen tools GitLab repository.
genpano.py <path_to_images> <brackets_size>
This script takes all images created by RawTherapee and merges each stack into a tone mapped image jpg/merged_{i}.tif.
This is being performed through the command line tool luminance-hdr-cli. In contrast to Greg, I use the mai
tone mapping operator. This in my opinion helps the Hugin control point finder later on. It will also use
exiftool to transfer camera information from the raw images into the tone mapped image.
Afterwards it will create a Hugin project for stitching called pano.pto. Additionally
it already removes control points, that likely lie on the tripod.
Now fine tuning the Hugin project begins. After opening, I create masks for the tripod and other unwanted objects. Hugin offers a function to remove control points within masks. This will delete the autogenerated ones, that were detected on the panoramic head. Then I continue with Edit->Fine-tune all points and in the control points window (F3) remove all points with a correlation below 0.4. Now I’m re-optimizing the panorama using the Everything without translation approach. This should end up with a nicely stich-able panorama.
The panorama might not be upright. Thus I straighten the panorama horizon by applying the Straighten function in the preview window tab Move/Drag. This usually works and I might only need to turn it by 180° to put the sky back up.
Sometimes it’s also necessary to add control points manually, in case the automatic creation didn’t find any between 2 specific neighbored images. This usually happens in the sky on clear days. If really nothing is available to set control points on, I go to the image list and adjust the camera parameters manually.
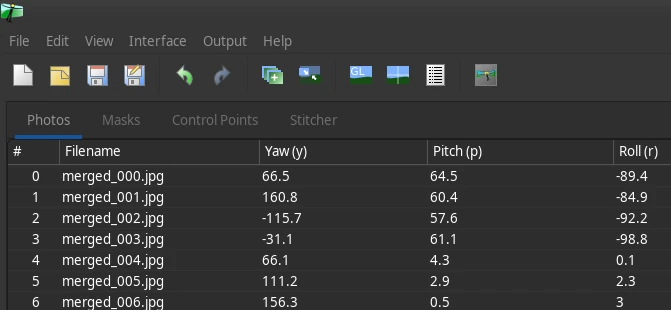
Since the panorama was shot with predefined angles, this is possible, but not as accurate than having control points relating features to each other. However it’s also not an issue for clear sky images, since they will anyhow blend in nicely.
Now it’s time to merge individual exposure HDRIs. A second script takes the finished panorama project of the tone mapped images and merges each individual exposure into its own panoramic image. After all exposures were merged, mergePano.py is being used to merge the panoramic exposures into an HDR panorama.
mergePano.py <hugin-project> <path_to_images> <brackets_size>
This approach was chosen, because Hugin always causes troubles when either blending individual pre merged HDRs for the bracket stacks or when performing the blending and merging from all source images. The approach to blend individual LDR panoramas for each shot exposure and merging them afterwards into an HDR worked without problems. This is more compute intensive, but it at least provides a satisfying result.
If one exposure stack with an ND filter was shot for the sun, I run another mergePano step to generate an exr, that can be composited over the full panorama.
mergePano.py <hugin-project> <path_to_images> <brackets_size> -sun <sun_stack>
Afterwards use your favorite image editor (e.g. Gimp) to perform an exposure/color correction on the sun layer and put it over the clipped panorama.
Post processing
In order to remove the holes, the tripod masks left over, I use again Gimp with the G´MIC-Qt plug-in collection. First I perform a panoramic transformation from the Filter->Rendering menu, generating a view directly downwards. Afterwards I mask the regions to be filled with pure red color. This acts as a mask for the G´MIC filter. The filter itself is the Inpaint [Multi-Scale] one. This calculation is pretty compute intensive and can sometimes even take longer than merging the panorama. Sometimes it’s necessary to repeat the step or manually fix the areas with the clone or repair brush. When done, the panoramic transformation filter can be applied again, this time with the checkbox to reverse the transform enabled. This will generate a layer, that can be put on top of the original panorama.
Credits
Thanks to Greg Zaal for his great tutorial on PolyHaven.
My scripts are available on GitLab - HDRGen